How to Build a Cleaner, More Repeatable Meshtastic Raspberry Pi Setup
The Raspberry Pi has become one of the most popular platforms for running Meshtastic, and it is easy to see why. It brings the flexibility of Linux into the mix, allowing you to run meshtasticd Raspberry Pi deployments alongside MQTT brokers, dashboards, logging tools, and automation workflows. On paper, it feels like the perfect foundation for building something more powerful than a typical handheld node within a LoRa communication system.
But if you have ever tried running a Raspberry Pi Meshtastic setup for more than a few days, especially in an always-on role, you have probably noticed something doesn’t quite hold up. The issue is rarely the software. More often, it is the hardware stack holding everything together. A Raspberry Pi Meshtastic node is only as reliable as the way its radio, sensors, and interfaces are connected.
The Common Problems With DIY Meshtastic Raspberry Pi Builds
A lot of Raspberry Pi Meshtastic setups work fine at first. The weak points usually show up later, once the node is expected to stay online and do more than basic testing.
- USB radios can drop unexpectedly
What starts as a simple connection can become unreliable over time, especially after long runtimes or small power dips. This is a common reason users search for how to fix Raspberry Pi USB disconnect issue. - Loose cables create avoidable failure points
USB connectors, jumper wires, and adapters can shift, wear out, or disconnect, turning a working node into something that needs constant checking. - Extra features add extra complexity
As soon as you add GPS, sensors, Node-RED, Grafana, or other tools used in wireless sensor networks, the wiring and dependency chain gets harder to manage. - Each build ends up slightly different
Small changes in parts, layout, or wiring make one setup harder to reproduce exactly on the next node. - Scaling becomes harder than expected
What works for one experiment does not always translate into a clean process for building multiple nodes the same way. - The setup was never really built for long-term use
Many DIY builds are good for testing ideas, but not for serving as a stable, always-on infrastructure or a stable Meshtastic node setup.
Why meshtasticd Changes the Role of Raspberry Pi Nodes
There is an important shift that happens when you move from firmware-based nodes to running meshtasticd on a Raspberry Pi. At that point, you are no longer just running a simple node. You are building something closer to an IoT gateway architecture.
Firmware-based devices are typically portable, designed for mobility, low power consumption, and simplicity. They are not meant to host complex services or act as permanent network anchors.
A Raspberry Pi running meshtasticd plays a very different role. It becomes a Raspberry Pi LoRa gateway, a relay, or even a backbone node. It can bridge data into MQTT, feed dashboards, log activity, and support automation workflows. It is no longer just participating in the mesh; it is helping define a scalable mesh networking hardware environment.
That shift comes with new expectations. Infrastructure nodes are expected to stay online, maintain consistent connectivity, and operate without constant intervention. For that to happen, the hardware integration between the Pi and the radio must be just as stable as the software running on top of it.
What a Cleaner Meshtastic Raspberry Pi Setup Should Provide
A cleaner Raspberry Pi Meshtastic setup should do more than look organized. It should reduce the hardware weak points that cause downtime and make the build easier to repeat across multiple nodes.
A reliable setup should provide:
- Direct radio integration to avoid USB adapters and loose jumper wires.
- Stable power and data connections for long runtimes in gateway or relay roles.
- Modular expansion for adding GPS, sensors, or different LoRa radios without rebuilding the whole setup.
- Linux workflow compatibility so meshtasticd can run alongside MQTT, dashboards, logs, and automation tools.
- Repeatable deployment so one successful build can become the model for future nodes.
This is what separates a quick prototype from a Raspberry Pi Meshtastic gateway that is ready for real deployment or even a modular Raspberry Pi IoT gateway.
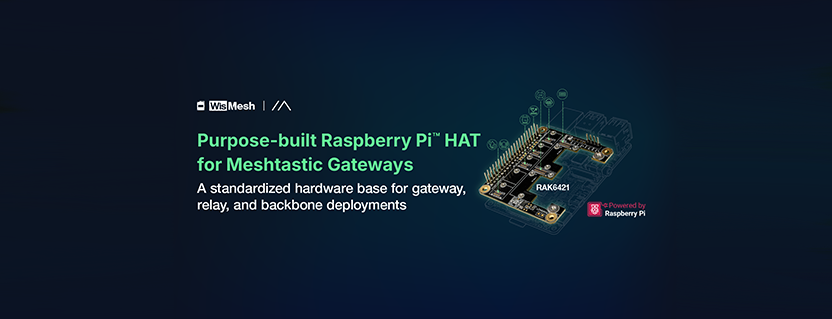
Introducing WisMesh Pi HAT RAK6421
WisMesh Pi HAT RAK6421 gives Raspberry Pi Meshtastic builds a cleaner way to connect WisBlock LoRa radios, GPS, and sensors without USB adapters or loose wiring. It serves as a purpose-built Raspberry Pi LoRa HAT designed for structured deployments.
It creates a more stable, repeatable base for gateways, relays, and backbone nodes running meshtasticd.
Key Features That Matter for Real Deployments
When you move from a DIY setup to something you expect to run continuously, the small details start to matter a lot more.
| Feature | What It Changes | Why It Matters |
|---|---|---|
| Direct 40-Pin Raspberry Pi Integration | Connects the radio directly to the Pi without USB adapters | Reduces disconnects and improves stability |
| WisBlock Modular Radio Options | Allows different LoRa modules | Flexible deployment per region or range needs |
| High-Power 1W Radio Support (RAK13302) | Higher transmission power | Better long-range and backbone links |
| GPS and Sensor Expansion | Adds telemetry and location data | Enables monitoring and data-aware nodes |
| HAT+ Auto-Discovery | Automatic hardware detection | Simplifies setup and scaling |
| Gateway-Ready Linux Stack | Runs MQTT, Node-RED, Grafana | Enables full IoT gateway functionality |
Example Use Cases
| Use Case | Where It Fits | What It Does | Why Stability Matters |
|---|---|---|---|
| Rooftop Backbone Relay | Towers, rooftops | Extends mesh range | Must run continuously without access |
| Indoor Gateway | Homes, offices | Bridges data to systems | Downtime breaks data flow |
| City Mesh Node | Urban deployments | Scalable network nodes | Consistency across nodes |
| Sensor-Aware Gateway | Monitoring sites | Collects telemetry data | Requires continuous accuracy |
How It Compares to Generic LoRa HATs and DIY Setups
Generic USB or LoRa HAT setups are fine for testing, but as systems scale, reliability becomes the focus.
The WisMesh Pi HAT RAK6421 combines:
- Pi-hosted Linux stack
- WisBlock modularity
- Sensor and radio expansion
- HAT+ auto-discovery
- High-power radio support
It becomes a repeatable deployment platform rather than just a prototype setup.
What You Need to Build a Working Node
A full setup includes:
- Raspberry Pi (Pi 4 or Pi 5)
- LoRa radio module
- Antenna
- Optional GPS or sensors
Software:
- meshtasticd running on Linux
Build a Cleaner Raspberry Pi Meshtastic Gateway
DIY setups often work until they are pushed into always-on roles. Then weak points become real problems.
A structured hardware approach improves reliability and repeatability.
WisMesh Pi HAT RAK6421 supports this transition by turning a Raspberry Pi into a stable Meshtastic platform.
Get in touch: sales@rfdesign.co.za / +27 21 555 8400
Courtesy of RAKwireless